This Quick Start Guide is designed to help users navigate through TourBuilder Insights, view and operate their virtual tours, learn how to embed them, and more.
Logging In
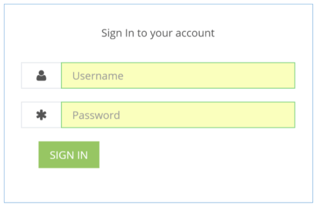
1. Navigate to login.tourbuilder.com.
2. Type in the Username and Password provided to you by your LCP Media Support Specialist.
If you forget your password, you can contact your TourBuilder Administrator to reset it.
Updating Your Password
As a best practice, it is important to update your password after your first login.
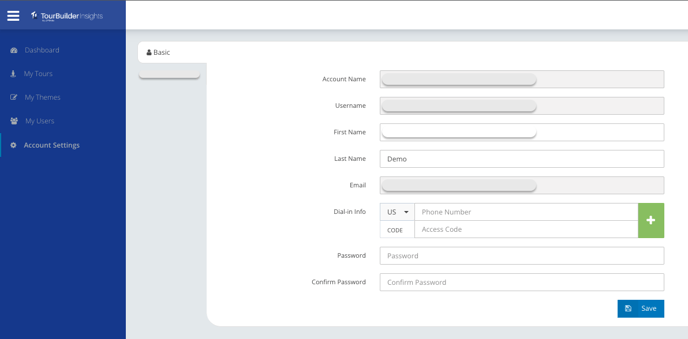
1. Click the Gear Icon at the very bottom of the left navigation, labeled Account Settings.
2. From this section, you can update your password.
3. Once you've updated and confirmed your password, click Save.
Dashboard & Navigation
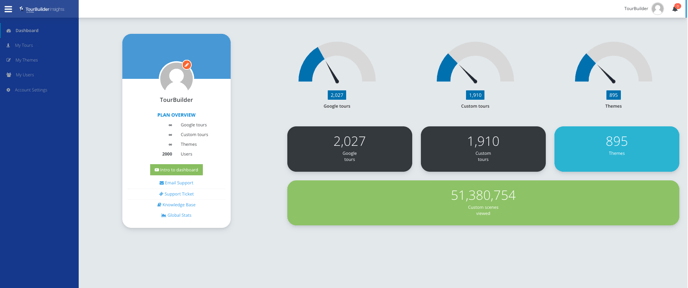
Your TourBuilder Dashboard allows you to access your analytics as well as navigate your various virtual tours.
Let’s take a quick tour of the options located on the navigation bar on the left:
Dashboard: When you first log into TourBuilder, you will land on your Dashboard. Here you can see your plan overview and check the global analytics for all of your tours by selecting the Global Stats icon.
My Tours: View all of your tours.
My Themes: View your unique virtual tour custom themes and make theme edits.
My Users: View list of users, add new users, remove users and update user permissions.
Account Settings: Access and update your profile information or change your password.
Adding New Users
As an admin, you can control who has access to your TourBuilder Dashboard, as well as which tours your users can see.
To add new users:
1. Click the My Users button in the left navigation.
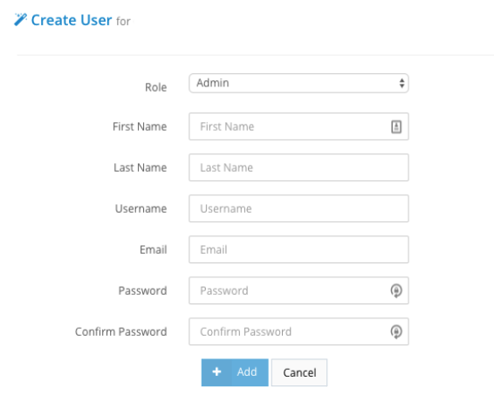
2. At the top of the page, click "+ Add" to add a new user.
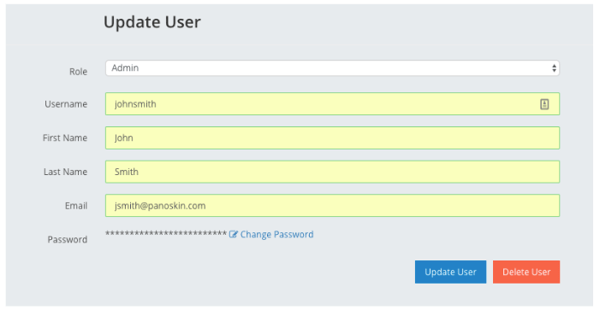
3. Select one of the 3 role types of the new user along with basic user information. The password can be reset by the user once they log in for the first time.
The 3 role types are:
Admin: Can view all tours and themes, edit, add/ remove users, and reset user passwords.
Editor: Can view tours that they were given access to and edit themes of those tours.
Viewer: Can only view tours that they were given access to.
All three access types can view tour analytics and reporting, view TourBuilder unit tours, view share options, and use Tourbuilder Connect.
4. To remove a user click on the username of the individual you want to delete from the Users list. Select the Delete User button in the Update User window.
Embedding & Sharing
One of the most dynamic features of TourBuilder is the ability to share your virtual tours and embed them directly on your website to convert more users.

1. From the TourBuilder Dashboard, navigate to the My Tours section.
2. Click the name of the tour you will be sharing.
3. Click the Share tab.
4. Click the Tour URL and copy the link in the box to share.
5. Click Embed for your embed code to add the tour to your webpage.
6. Click the QR Code to save the image to use in marketing.
</> Embed: Provides a unique code for embedding the TourBuilder Tour on your website.
Tour URL: Quick link to the tour that can be inserted into websites, social media, email, etc.
QR Code: Allows you to seamlessly share your TourBuilder virtual tour. Download the QR code and print it as stickers, signs, and handouts, or share them digitally. Add codes to tabletop signs, leasing office desks, or even door decals when the building is closed to maximize visibility and streamline the viewing process.
TourBuilder Analytics
The analytics associated with your TourBuilder tour allows you to understand how your customers are using the tour. It’s important to know exactly what is being measured in order to make informed decisions about your tour and business.
Let’s walk through each of the key metrics:
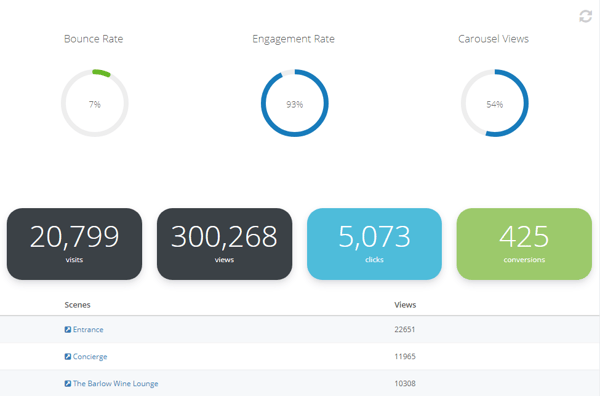
Bounce Rate: Percentage of people who land on the tour and do not engage
Engagement Rate: Percentage of people who land on the tour and engage
Carousel Views: Percentage of scenes viewed that come from the carousel
Visits: Counts the number of times the tour is loaded per unique session
Views: Counts the number of 360 scenes viewed
Clicks: Counts the number of clicks on the right-hand menu
Conversions: Counts the number of times the call-to-action button is clicked
Scenes/Views: Counts the number of times a specific scene is viewed
TourBuilder Reporting 2.0
The reporting tab dives into more detail about your virtual tours' performance on your website and any other site it has been embedded on.
The reporting feature is broken down into 5 sections. All of the data can also be downloaded into a CSV file, where you can select the date range of the download as well as the metrics you want.
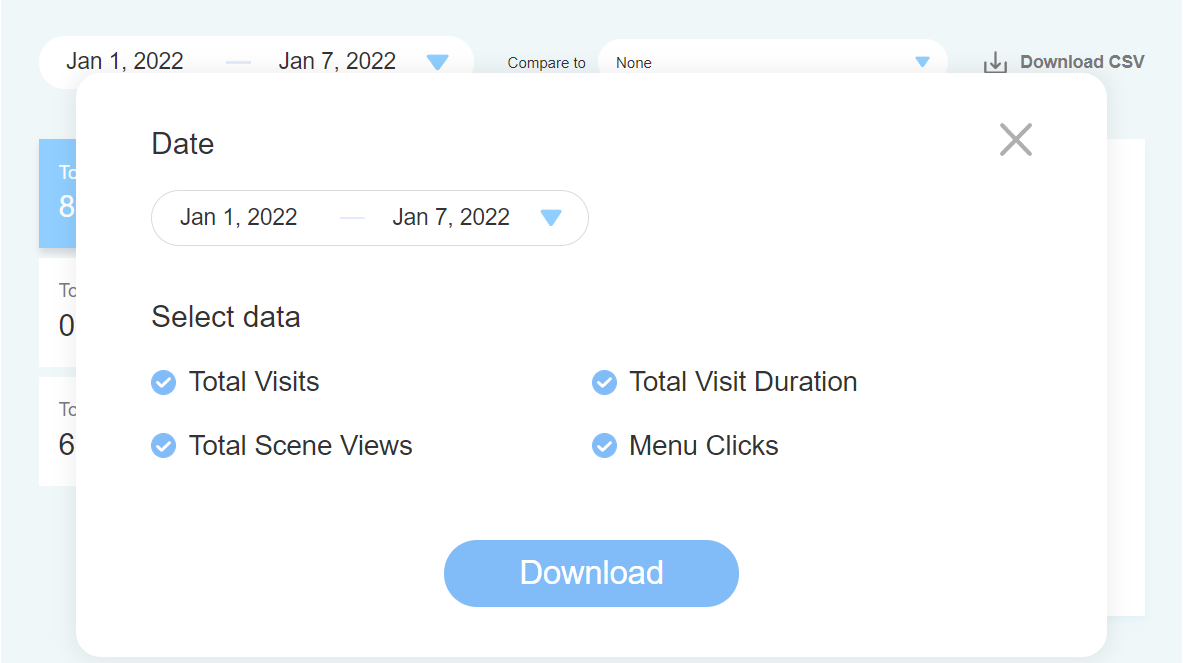
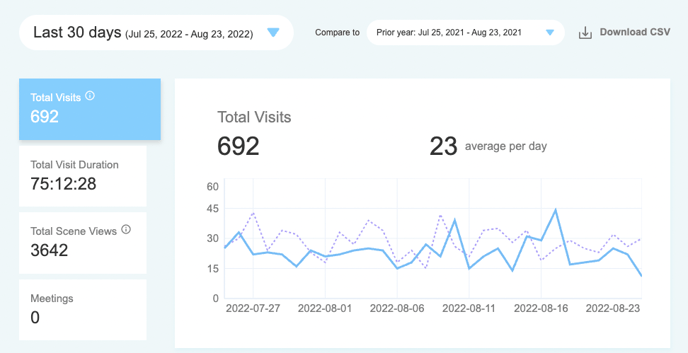
- Select and Compare Date ranges - users can select and compare date ranges to measure total visits, visit duration, and total scene views over selected periods of time.
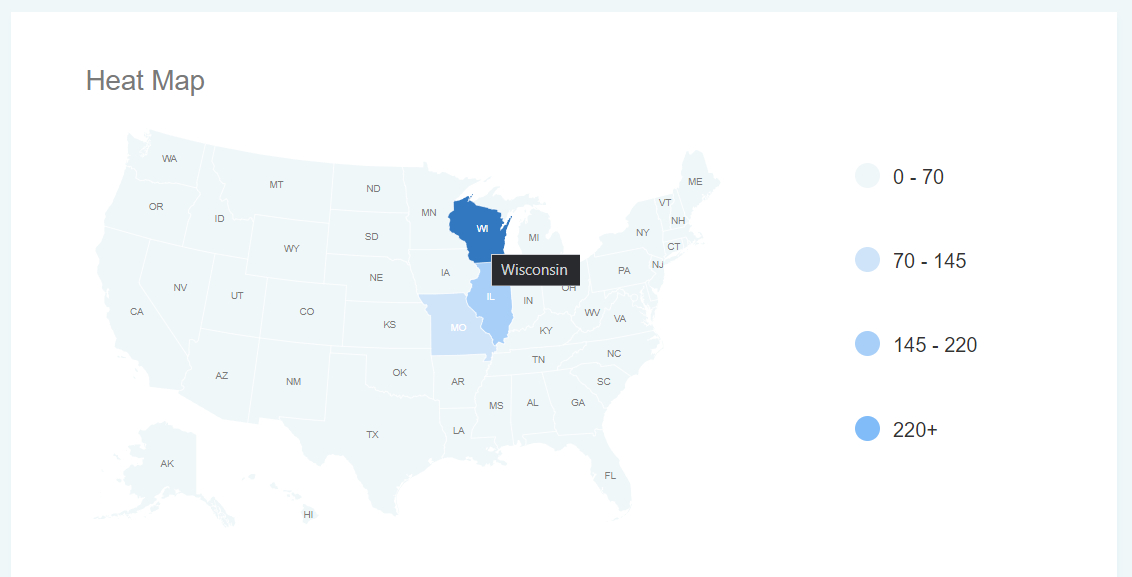
- Heat Map - gives the ability to track the local source of your virtual tour visits, scene views, and visit duration within the United States. To view more granular locality metrics, select your date range and a metric at the top and click on a state.
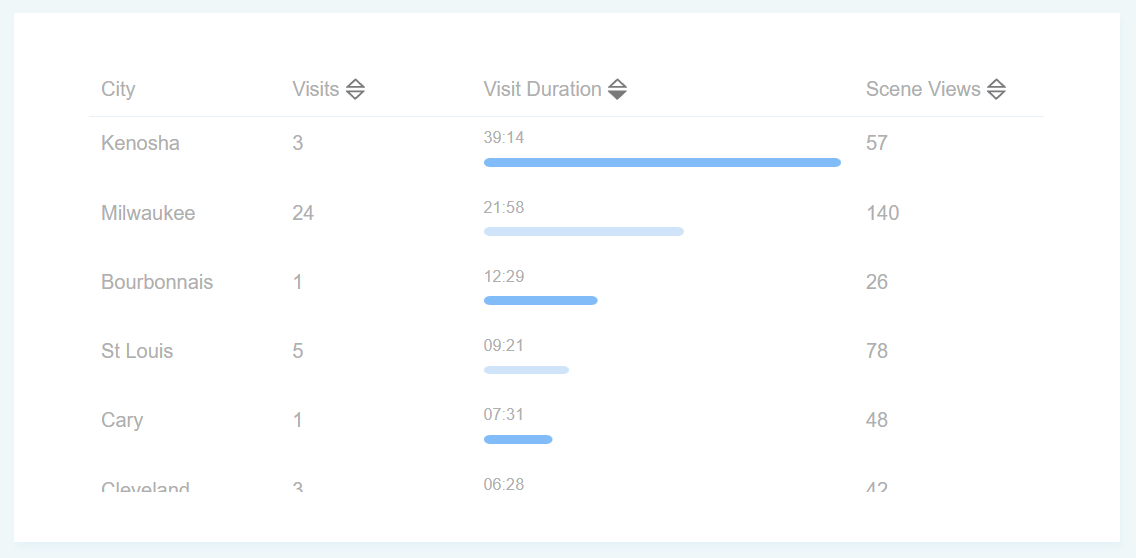
- Visits By City with Visit Duration - gives a breakdown of visits, visit duration, and scene views by city which can be sorted by using the arrows next to the 3 metrics.
- Chanel & Device Source - track the source of visits, views, and visit duration by Website, Direct, or Other. This also tracks what devices your virtual tour traffic is coming from, including Desktop, Mobile, or Tablet.
Direct - means the tour was visited with the tour direct link and not iframed on any website.
Others - tracks any other pages the tour was visited on such as an ILS (Apartments.com, Zillow, Zumper...).

-
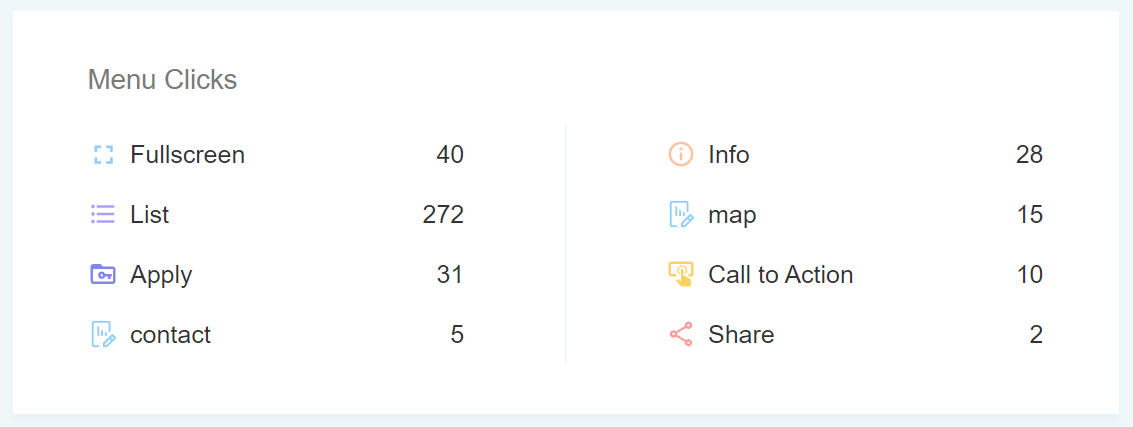
Menu Clicks - breaks down how many clicks each menu option had.
The List option is a custom button that can be created for your property such as a floor plan selector or amenities breakdown based on your industry. The call to action is a customizable button that can be labeled based on your industry as well, such as "lease now", "book a room", or "find a doctor".
All of the menu buttons have customizable options which can be updated by our client care team.
Hosting a Virtual Meeting with TourBuilder Connect
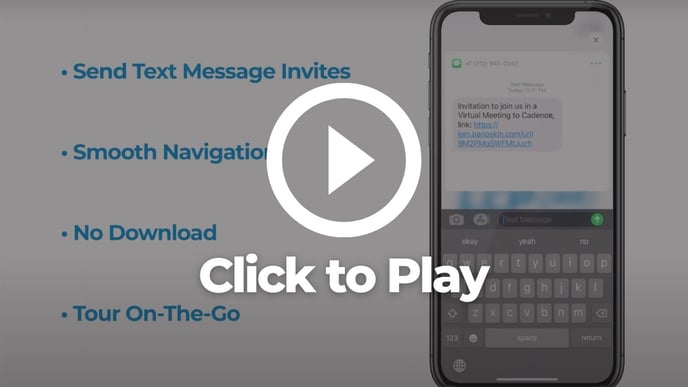
You can offer guided tours for your prospects in high resolution with audio and video, and smooth navigation. This feature requires no downloads or plugins and will work on any computer or mobile device.
.png?width=688&name=Its%20Finally%20Here!%20Panoskin%20now%20supporting%20video%20and%20Audio..pdf%20(1).png)
1. Once you’ve selected a tour from the My Tours section, select the Meeting tab.
2. Click Start Meeting.
3. Once your tour loads, you can add individuals to the meeting by clicking the add users icon.
4. You will be prompted to invite your attendee in 1 of 3 ways, sending an SMS, sending an email, or direct URL.
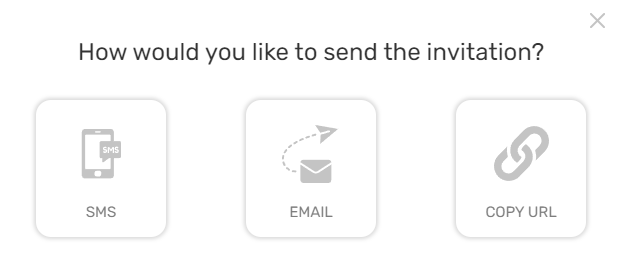
5. To invite your attendees with a text message or email, select one of the two and then add their phone numbers or email addresses in the space provided. After you type in the contact info, click “+ Send SMS/+ Send Email ”.
6. When sending the invitation via SMS, your attendees will receive a text message that states "Invitation to join us in a Virtual Meeting to ..." with a link to join. If the invitation is sent to an email, attendees will receive the request via a property-branded email. They will then click on the Join Meeting button that will prompt them to enter their name and email.
7. As users join the meeting, you will see their names and video feed bubbles populate on the right-hand side.
8. To start the meeting, simply move your screen and it will mirror on your prospects device. To enter full-screen mode, click the expand icon.
9. There is a rotation bar available at the top of the screen that allows for easier and smoother rotation. Hosts can also show images during the live virtual tour.
10. To exit the meeting, click the X icon.
Tips for using the guided virtual meeting tool
- Engage with prospects from out of state or out of town that can't visit in person.
- Follow up with prospects who previously had an on-site tour and refresh their memory on what your community looks like.
- Connect virtually if on-site tours are not available
- Great alternative for prospects who cancel on-site tours.
Watch the full TourBuilder Connect Video Below
Meeting Reporting
After you've ended the guided tour, the individual will be redirected to the TourBuilder virtual tour to continue exploring your property.
In addition, you can track the activity of your meetings in the Reporting tab. There you can see who from your team ran a meeting, the email address(es) of meeting participants and when meetings took place.
Have More Questions?
Have a question about your TourBuilder virtual tour or don't see what you're looking for? Contact our support team at clientcare@LCPMedia.com.